To ensure an accurate measurement of intraocular pressure,
a tonometer needs accurate calibration. To check if the calibration is
correct, a calibration bar is used.
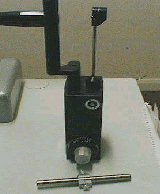
Tonometer and a calibration bar.
|
The following pictures and steps show how the calibration is
checked:
1. Attach the calibration bar to the body of the tonometer as shown
below.

Attach the bar to the
tonometer.
|
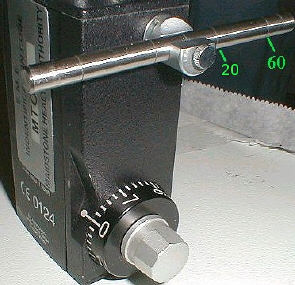
2. The bar has five markings, the central one is used to check
if the tonometer has been
calibrated accurately for 0 mmHg, the next markings
on either side of the centre are
used to check for accurate calibration for 20 mmHg.
The last markings nearest to the
end are used to check for 60 mmHg (see pictures
below).
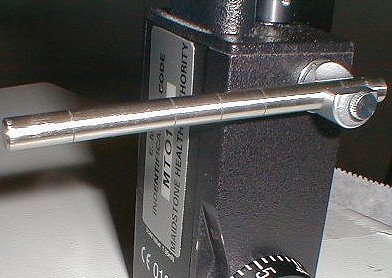
3. To check if the tonometer has been correctly calibrated
for 60 mmHg, line up the
marking on the bar furthest from the centre with
the marking on the knob that hold
up the bar (as shown in the picture below; to check
for 0 and 20 mmHg line up the
bar as described in 2 and repeat steps 3 and 4).
4. Now move the knob on the tonometer and note the pressure at which
the tonometer
tip tilt forward. If the tilt occurs when the pressure
is at 60 the tonometer is calibrated
correctly. If the tilt occurs below or above 60,
the tonometer should be sent for
re-calibration.
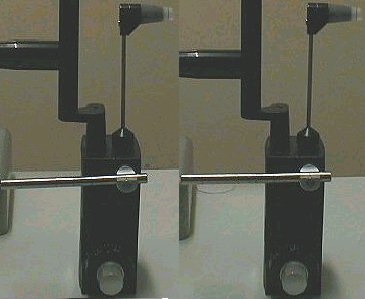
Checking the calibration for 60 mm Hg. The end point
occurs
when the tip of the tonometer tilts forward and
the bar moves to
horizontal position. If the reading is 60 at this point,
the tonometer
is correctly calibrated. |
The animation shows a tonometer with an accurate calibration
for 20 mmHg.
|